Milking machine testing is essential for maintaining udder health, preventing mastitis, and ensuring efficient milk production. Your milking machine spends 50-100 hours attached to each teat during lactation, making it one of the most critical pieces of equipment on your dairy farm. Machine malfunctions can cause teat damage and significantly increase the risk of mastitis infection.
Virtually all infections enter the udder through the teat openings. A properly functioning milking machine removes milk efficiently without damaging teat tissue, while a malfunctioning machine can create conditions that promote bacterial growth and infection. Regular testing identifies problems before they cause health issues in your herd or reduce milk quality.
The milking parlour is the most important machinery on a dairy farm because it directly affects your ability to harvest and sell milk. Proper testing and maintenance ensure this equipment operates at peak efficiency while protecting animal welfare.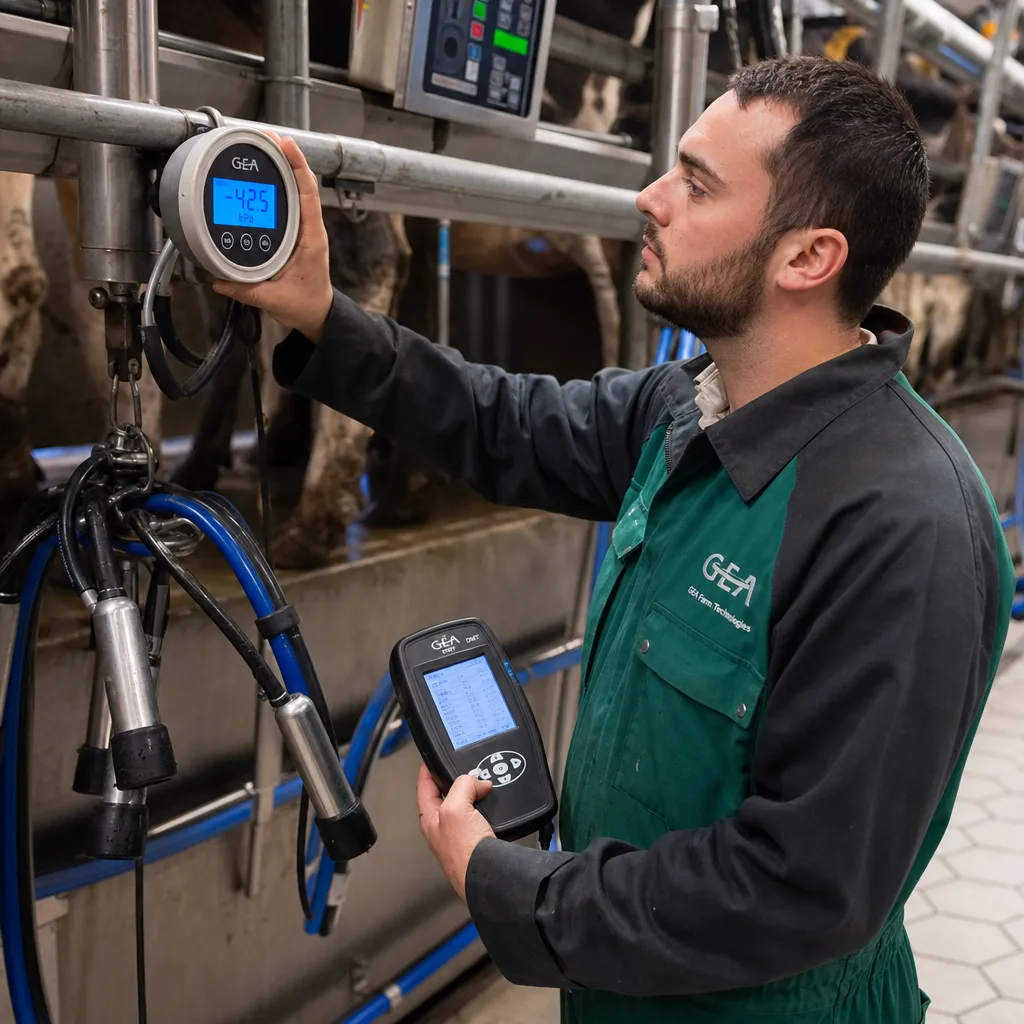
How Often Should You Test Your Milking Machine?
Professional milking machine testing should be performed at least twice per year by a qualified technician. However, testing frequency may need to increase based on herd size, machine usage, and any observed problems.
Standard Testing Schedule
- Twice yearly: Full professional test and service by IMQCS-qualified technician
- As needed: Additional testing when problems are observed
- Before and after service: When mastitis problems exist, test before any adjustments and again after service
When to Schedule Additional Testing
Immediate additional testing and service is recommended if any of the following are observed:
- Cows appear to milk slowly or incompletely
- Clusters slip or fall off frequently
- Teat condition is poor (discoloration, rings, or swelling)
- Cows appear nervous or uncomfortable during milking
- Vacuum levels fluctuate or read incorrectly
- Pulsation sounds irregular
Don't rely only on routine service appointments. Proactive testing between scheduled services can prevent small problems from becoming major issues that affect milk quality and cow health.
What Are the Types of Milking Machine Tests?
Milking machine tests fall into three main categories: dry tests, wet tests, and milking-time tests. Each type provides different information about machine performance and helps identify specific problems.
Dry Tests
Dry tests are conducted with the machine running but not milking, with only air flowing through the system. These tests evaluate:
- Vacuum levels in various parts of the system
- Vacuum fluctuations and stability
- Vacuum pump output and reserve capacity
- Pulsator performance and timing
- System leakage detection
Dry tests have been loosely described as "static testing," though this terminology is not entirely accurate since the machine is running during these evaluations.
Wet Tests
Wet tests are performed with the machine running without milking cows, but with both air and liquid (water) flowing through the system. Wet tests measure:
- Vacuum levels and fluctuations in pipelines and clusters
- Vacuum drop across components
- Liquid discharge rate from releaser milk pump
- System performance under simulated milking conditions
Milking-Time Tests
Milking-time tests provide the best and most direct indicator of milking system performance. These tests involve measurements and observations made while actually milking cows, revealing how the machine, operator, and cows interact during real-world conditions.
Milking-time tests evaluate:
- Vacuum stability during attachment, milking, and detachment
- Actual claw vacuum during peak milk flow
- Mouthpiece vacuum and its effect on teat condition
- Operator technique and timing
- Cow behavior and milking efficiency
What Does a Professional Milking Machine Test Include?
A complete professional milking machine evaluation includes comprehensive measurements of vacuum levels, airflow, pulsation, and system components. This evaluation should be performed after every 500-1000 hours of operation as part of regular maintenance.
Core Test Components
Vacuum System Evaluation:
- Operating vacuum in the receiver
- Vacuum difference between receiver, vacuum pump, regulator, and pulsator air line
- Effective reserve and manual reserve capacity
- Falloff test to determine reserve capacity
- Regulator undershoot and overshoot response
- System leakage measurement
- Vacuum pump capacity
Pulsation Testing:
- Pulsation rate for all units
- Pulsation ratio for all pulsators
- B phase (milking phase) duration
- D phase (massage phase) duration
- Uniformity between units
Component Air Usage:
- Air consumption by pulsation system
- Air used by clusters
- Regulator air usage
- Ancillary equipment air consumption
Specialized Diagnostic Tests
Professional testing may also include:
- Mouthpiece chamber vacuum during peak milk flow
- Average claw vacuum using flow simulator
- Vacuum drop through long milk tube
- Vacuum drop through ancillary equipment (sensors, milk meters)
Daily Checks for Milking Machine Performance
Daily checks help identify problems early before they cause teat damage or mastitis. These simple observations require no special equipment but provide valuable information about machine function.
Vacuum Level Check
Teats can be damaged when vacuum isn't at the correct level. The recommended vacuum level is 48-50 kPA. You should be able to hear the vacuum regulator opening and closing when the cluster is attached to maintain stable vacuum.
If the farm vacuum gauge is not functional or inaccurate, install a functional gauge immediately. Farm gauges are often damaged and inaccurate, and sometimes the indicator needle sticks.
Air Admission Holes
Check that air admission holes in the claw piece are unblocked. Blocked air admission holes cause:
- Milk removed more slowly from the claw
- Large fluctuations in vacuum
- Liner slips during milking
- Milk remaining in liners when cluster is removed
Use the proper tool to unblock air admission holes when necessary.
Teat Condition Observation
Check cows' teats as clusters are removed. Problem indicators include:
- Red or blue discoloration: Indicates congestion or circulatory problems
- Rings at teat base: Suggests high mouthpiece vacuum
- Swelling: May indicate overmilking or vacuum problems
These signs may indicate high vacuum, poor pulsation, overmilking, or incorrect liner selection.
Cow Behavior Monitoring
Watch cows during milking. Unsettled behavior may indicate machine problems. Calm cows enter the milking parlor readily and generally don't defecate in the parlor. The release of adrenaline within 30 minutes of milking can interfere with milk letdown and prolong unit on-time.
Pulsator Sound Check
Listen to the pulsators during operation. Pulsation should be regular and intermittent. A continuous hiss indicates a leak, usually caused by grit or dirt under the pulsator valve seat. Check that pulsator air filters are clean and unobstructed.
Weekly Maintenance Checks
Weekly checks focus on component condition and system integrity. These checks help maintain consistent performance between professional services.
Liner Inspection
Check for twisted liners by ensuring liner markings on the hood and short milk tube are aligned. Look inside each liner to ensure they're not twisted in their shells. Look behind at least one liner in each cluster for signs of milk residues that may indicate a split liner.
Liner replacement schedule: Change liners every 2,500 milkings. Your service technician should calculate and inform you when liners need replacement based on herd size and parlour size.
Pulsator Airline Filters
Keep the filter on the pulsator airline clean. Clogged filters affect pulsation characteristics and can cause irregular pulsation timing.
Regulator Function
When milking, ensure the regulator is admitting air—you should hear a hissing sound. The volume of air should reduce when clusters are attached. If the regulator doesn't appear to close properly, check and clean the regulator filter.
Vacuum Line Drain Valves
The drain valve on the vacuum line should open when the milking machine stops. Any milk or water coming from the vacuum line after milking suggests a cracked liner or pulsation tube.
Vacuum Pump Oil System
Ensure oil system nozzles aren't blocked. Proper oil flow lubricates vacuum pump components and ensures smooth operation. If blocked, contact a technician to resolve the problem.
Monthly Performance Evaluations
Monthly evaluations assess overall milking efficiency and help track performance trends over time.
Milking Time Assessment
Monitor the time it takes to milk one cow. While milking time depends on cow yields, from milk let-down to finish, it typically ranges from 5 to 7 minutes. Significant deviations from this range may indicate machine or management problems.
Average Milk Flow Rate
Average milk flow rate is a good indicator of milking efficiency, calculated as total milk yield divided by total machine-on time. Low average milk flow rates or longer milking times can result from:
- Interference with letdown response due to cow uneasiness
- Inadequate cow stimulation
- Improper timing of unit attachment
- Milking machine problems
- Overmilking due to improper detachment procedures
How to Identify Milking Machine Problems During Operation
Observation during milking provides immediate feedback about machine performance and potential problems. Train operators to recognize warning signs.
Slow or Incomplete Milking
When cows appear to milk slowly or incompletely, possible causes include:
- Inadequate vacuum level or reserve capacity
- Blocked air admission holes
- Worn or incorrect liners
- Poor pulsation function
- Inadequate cow preparation
Cluster Slipping or Falling
Frequent cluster slips or falloffs indicate:
- Heavy clusters or uneven weight distribution
- Blocked air admission holes
- Flooding clusters or milklines
- Poor liner design
- Incorrect vacuum levels
The goal should be less than 5% of cow milkings requiring operator correction for slips or falloffs.
Teat End Condition Problems
Score teats for severity of teat end rings (hyperkeratosis) and note teat color after unit removal. Record the number of teats with good condition versus poor conditions. The criteria for acceptable teat condition: less than 20% of cows should have teat condition considered problematic.
Vacuum Gauge Issues
Tap the face of the vacuum gauge to check for a sticking needle. Sometimes the indicator needle sticks and won't move above operating vacuum level to indicate high vacuum if the regulator fails.
What Equipment Is Needed for Milking Machine Testing?
Different levels of testing require different equipment, from basic observational tools to professional diagnostic instruments.
Level I: Basic testing equipment
Simple machine checks and milking-time observations require:
- Stopwatch: For timing milking procedures and milk flow
- Level: For measuring milkline slope
- Vacuum gauge of known accuracy: For verifying system vacuum
A mercury column is recommended for regular calibration of test vacuum gauges, but should only be used as a reference instrument in a protected area due to health and safety risks.
Level II: Intermediate Testing Equipment
Pulsator performance and vacuum stability testing require:
- Single-channel or multi-channel vacuum recorder: For recording vacuum fluctuations
- At least 4 teatcup plugs: For testing pulsators with units connected
Most pulsator testers include options for measuring vacuum level, making them useful as accurate digital vacuum gauges.
Level III: Professional Testing Equipment
Complete professional evaluation requires:
- Vacuum recorder: Displaying average, minimum, and maximum vacuum over measurement periods
- Air flow meter: For measuring system airflow capacity
- Low range air flow meter: For measuring air admission at individual claws
- Flow simulator: For testing claw vacuum at known flow rates
How to Choose a Qualified Milking Machine Technician
The quality of your milking machine service directly affects herd health and milk production. Choose technicians carefully based on qualifications and standards.
IMQCS Standards
Use a milking machine technician who tests to IMQCS standards (Irish Milking Machine Testing Standards or equivalent international standards). The technician should preferably have a current IMQCS qualification or equivalent. Confirm qualifications before making the service appointment.
What to Expect from Professional Service
A qualified technician should:
- Perform complete system evaluation
- Provide detailed written test report
- Explain report findings in person
- Compare current report with previous year's results
- Complete service checklist documenting all work performed
- Prioritize recommendations by cost-benefit
When Mastitis Problems Exist
If there's a mastitis problem in the herd, the milking machine should be tested before any servicing or adjustment, and again after the service. This produces two test reports showing the machine's condition and the effectiveness of corrections.
Understanding the Milking Machine Test Report
The test report documents machine performance and identifies faults requiring correction. Understanding this report helps you make informed maintenance decisions.
Report Components
Test Report: Records required performance tests including:
- Airflow and vacuum readings
- Vacuum pump and releaser milk pump tests
- Machine vacuum gauge accuracy
- Fluctuations in pipelines and clusters
- Vacuum drop across components
- Liquid discharge rate measurements
- Pulsation test results
Summary Form: Records recommendations for each fault identified in visual observations and test observations. Recommendations should be brief but clear enough for farm manager to implement.
Comparing Reports
Compare the current test report with previous years. Assuming the installation hasn't been modified, results should be similar. Significant changes indicate developing problems or component wear.
Acting on Recommendations
Make a plan with a schedule that fits work commitments and cash flow. Don't postpone making your plan. Discuss the plan with milk quality advisors including your CellCheck advisor, veterinary practitioner, or other milking specialists.
Common Milking Machine Faults and Solutions
Understanding common faults helps you recognize problems and understand necessary corrections.
Vacuum System Faults
Low or unstable vacuum:
- Check vacuum pump capacity and condition
- Verify regulator function and cleanliness
- Identify and repair system leaks
- Ensure adequate reserve capacity
Regulator problems:
- Clean or replace regulator filter
- Check for sticking or slow response
- Verify regulator sizing matches system needs
Pulsation Faults
Irregular pulsation:
- Clean pulsator air filters
- Check for debris under valve seats
- Verify pulsator timing and ratio settings
- Compare performance between units
Pulsation out of specification:
- Pulsation rate should not deviate more than 3 cycles per minute between units
- Pulsation ratio should not differ more than 5 percentage points from specifications
- B phase should be at least 30% of cycle
- D phase should not be less than 15% and not less than 150 milliseconds
Liner and Cluster Problems
Worn liners:
- Replace at recommended intervals (every 2,500 milkings)
- Ensure correct liner size for teat dimensions
- Verify liners fit shells properly
Cluster issues:
- Check weight distribution
- Verify air admission holes are clear
- Inspect for cracks or damage
Best Practices for Milking Machine Maintenance
A comprehensive maintenance program combines professional testing with regular operator checks and prompt attention to problems.
Establish a Testing Routine
- Schedule professional testing twice yearly
- Conduct daily checks during every milking
- Perform weekly maintenance checks
- Track monthly performance metrics
- Test immediately when problems appear
Train Operators Thoroughly
Operators should understand:
- Normal machine sounds and operation
- Warning signs requiring attention
- Proper milking procedures that protect equipment
- How to document and report problems
Maintain Records
Keep records of:
- All test reports and service visits
- Liner replacement dates
- Problems observed and corrections made
- Milking time and flow rate trends
- Teat condition scores over time
Prioritize Recommendations
When test reports identify multiple issues, address them in priority order:
- Priority 1: Urgent and important changes affecting cow health
- Priority 2: Important but not urgent improvements
- Priority 3: Cosmetic or efficiency improvements
Integrate with Overall Milk Quality Program
Coordinate milking machine maintenance with:
- Mastitis monitoring and prevention
- Teat condition scoring
- Milking procedure optimization
- Milk quality testing
Regular testing and maintenance of your milking machine protects your investment, ensures efficient milk harvest, and most importantly, safeguards the health and welfare of your dairy herd.